This section applies to the Netrunr B24C and E24 gateways. Take a few minutes to familiarize yourself with the indicators and connection ports on the gateway. Text labels are used to mark LAN and WAN ports. Ensure that all applicable antennas are correctly attached. For any issues with the setup or use of this product, please contact us at support@axiomware.com for assistance.
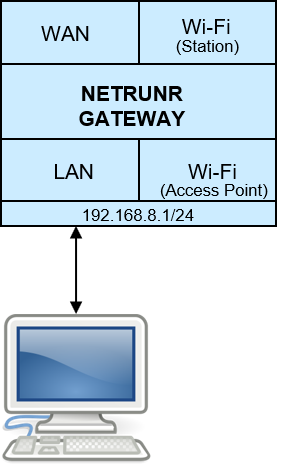
Netrunr gateway has to be connected to the network to access the Netrunr API and system configuration. The following four options are provided for network connectivity:
- Wired LAN connection - Setup Guide
- Wired WAN connection - Setup Guide
- Wi-Fi Access point connection - Setup Guide
- Wi-Fi Station mode connection - Setup Guide
Wired LAN connection
The LAN connection option is the simplest and the recommended method when getting started with Netrunr gateway products. The LAN interface option should be used to recover from any issues arising from network or system misconfiguration.
Hardware Setup
Attach any external antennas as required for your gateway. Power on the gateway and verify that the power LED is ON. The Netrunr gateway requires up to 120 seconds to completely boot-up.
Connect an Ethernet cable from the Netrunr gateway LAN port to computer. If LAN activity LEDs are present, check if they indicate network traffic flow. The LAN port of the Netrunr has a static IP address of 192.168.8.1 and it automatically assigns an IP address to your computer on the 192.168.8.1/24 sub-net.
Network connection from your computer can be verified using the ping utility from a terminal window or command prompt:
ping 192.168.8.1
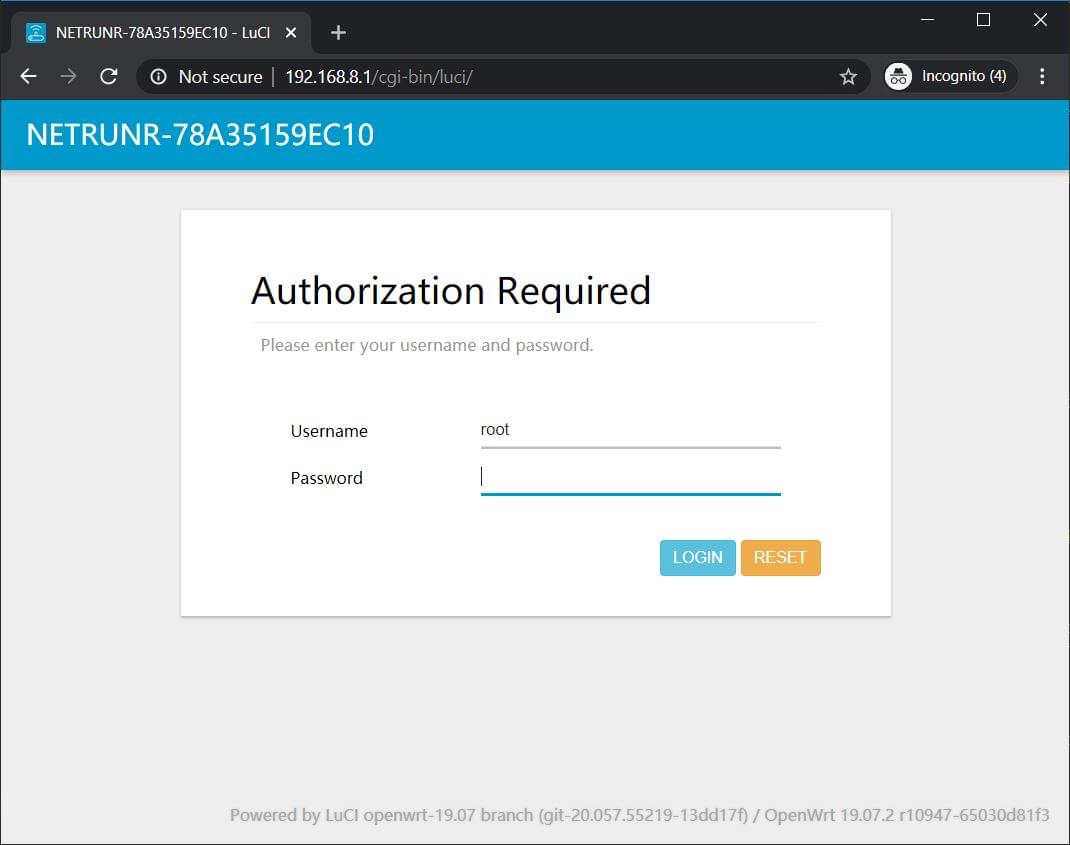
You can also verify connectivity with a web browser by opening the URL http://192.168.8.1
Wi-Fi Access Point connection
This option is similar to the LAN connection. The Netrunr gateway operates a Wi-Fi Access Point (AP) on the 2.4 GHz band. The SSID of the AP is unique to each gateway and is related to the BT-ID. For example, if the BT-ID is BT78A35159EC10, the SSID will be NETRUNR-78A35159EC10. The factory set password is liberte0
IMPORTANT NOTE: For some operations, the Wi-Fi connection from your computer to the gateway may disconnect. The Netrunr webpage will become unresponsive. Check your Wi-Fi connection and reconnect to the gateway as needed.
Hardware Setup
Attach any external antennas as required for your gateway. Power on the gateway and verify that the power LED is ON. The Netrunr gateway requires up to 120 seconds to completely boot-up.
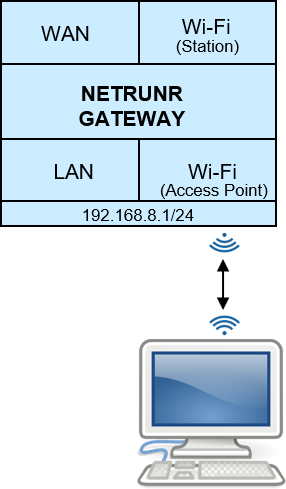
A Wi-Fi capable computer is required for this step. Using this computer, scan for wireless networks with SSID that match the label of your gateway. Based on your operating system, follow the procedures to connect to the wireless network. Use the default password, if it has not been modified. The W-Fi AP has a static IP address of 192.168.8.1 and it automatically assigns an IP address to your computer on the 192.168.8.1/24 sub-net.
Network connection from your computer can be verified using the ping utility from a terminal window or command prompt:
ping 192.168.8.1
You can also verify connectivity with a web browser by opening the URL http://192.168.8.1
Wired WAN connection
The wired WAN connection provides the capability to configure your gateway and a back-haul data link. Netrunr gateway operates a DHCP client on the WAN port. A DHCP server on your network has to provide IP address, DNS and NTP services.
Hardware Setup
Attach any external antennas as required for your gateway. Power on the gateway and verify that the power LED is ON. The Netrunr gateway requires up to 120 seconds to completely boot-up.
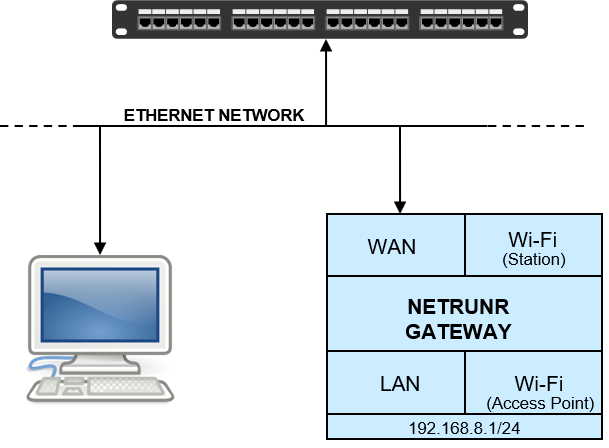
Connect an Ethernet cable from the Netrunr gateway WAN port to a Ethernet port of your local network. If LAN activity LEDs are present, check if they indicate network traffic flow. The WAN port of the Netrunr will acquire an IP address in the sub-net operated by your network. The IP configuration of the Netrunr gateway may be obtained from the admin page of your network router or you may have to contact the network administrator to obtain this information.
For example, if the IP address of the gateway is 192.168.1.10. Network connection from your computer on the same sub-net can be verified using the ping utility from a terminal window or command prompt:
ping 192.168.1.10
You can also verify connectivity with a web browser by opening the URL http://192.168.1.10