Thank you for choosing Netrunr B24E Bluetooth gateway. For any issues with the setup or use of this product, please contact us at support@axiomware.com for assistance.
Package contents
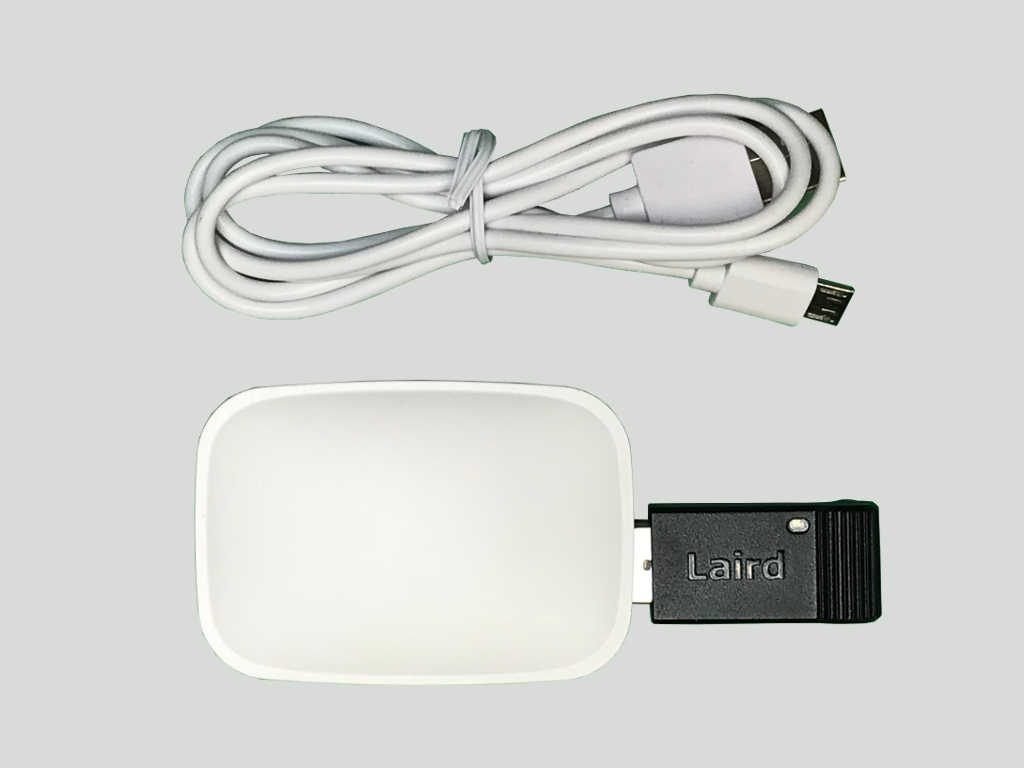
- Netrunr B24E gateway
- Micro-USB cable
- Quick start guide (online)
- Android Netrunr app on Google Play.
- iOS Netrunr app on Apple App Store (coming soon).
Please note: A 5V, 500mA (2.5 W) power supply like VEL05 is required to power up the gateway. This power supply is not included with the gateway.
Getting to know the gateway
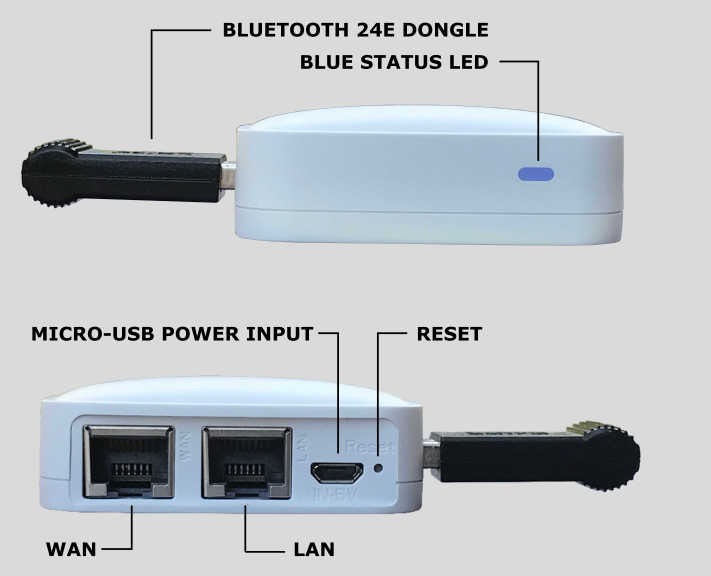
Take a few minutes to familiarize yourself with the indicators and connection ports on the gateway.
All Netrunr B Bluetooth gateways follow the exact same setup procedures.
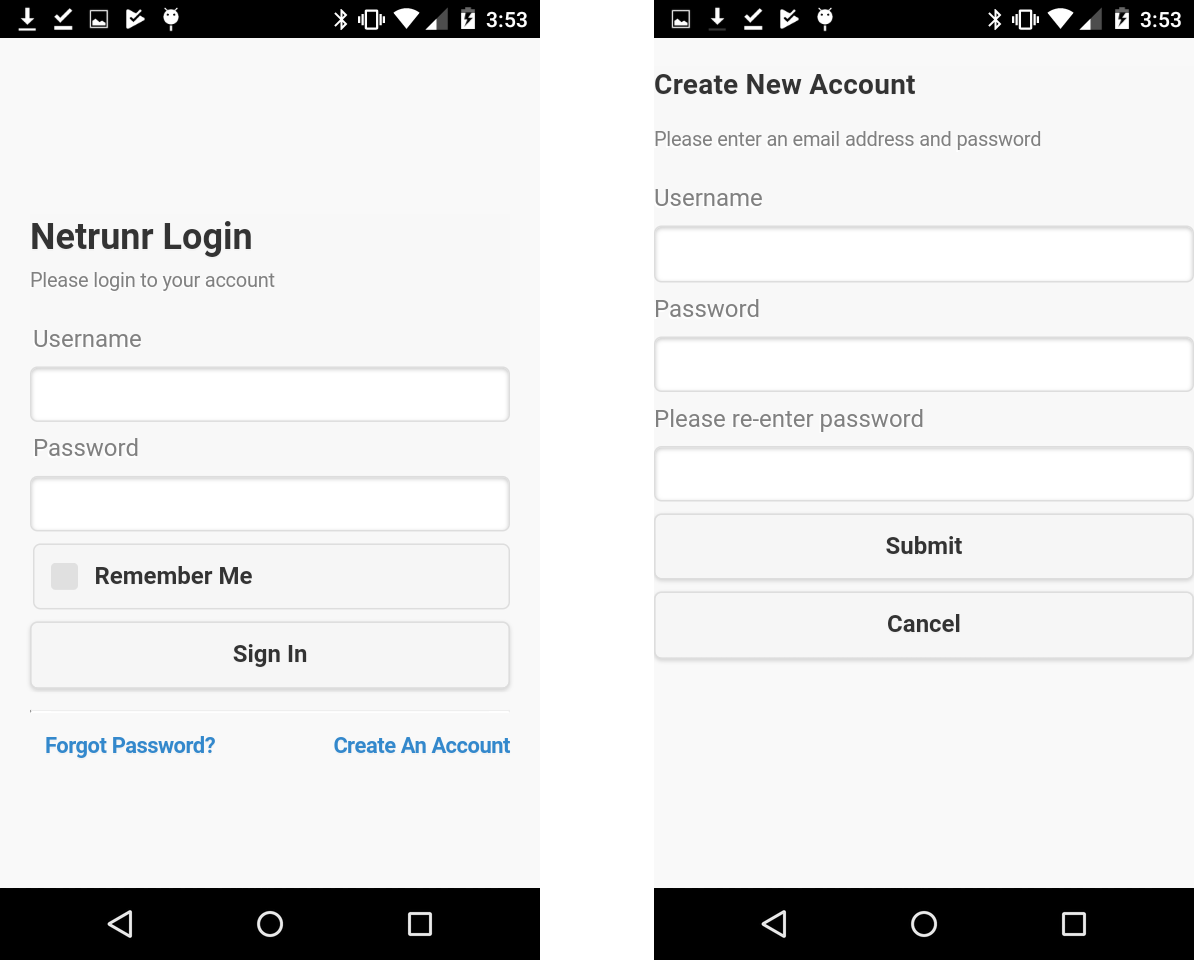
Creating an account
This is a one-time process to create an Axiomware Cloud Account. If you already have an account, you can skip this step.
- Download the Netrunr app from the link above and open the app.
- Select Create An Account link.
- Enter an user name. User name must be in email format. This email is also used for password recovery.
- Enter a password and reconfirm it.
- Press Submit.
Provisioning a Netrunr B24E Gateway
Provisioning is a one-time step to add a Netrunr gateway to your account:
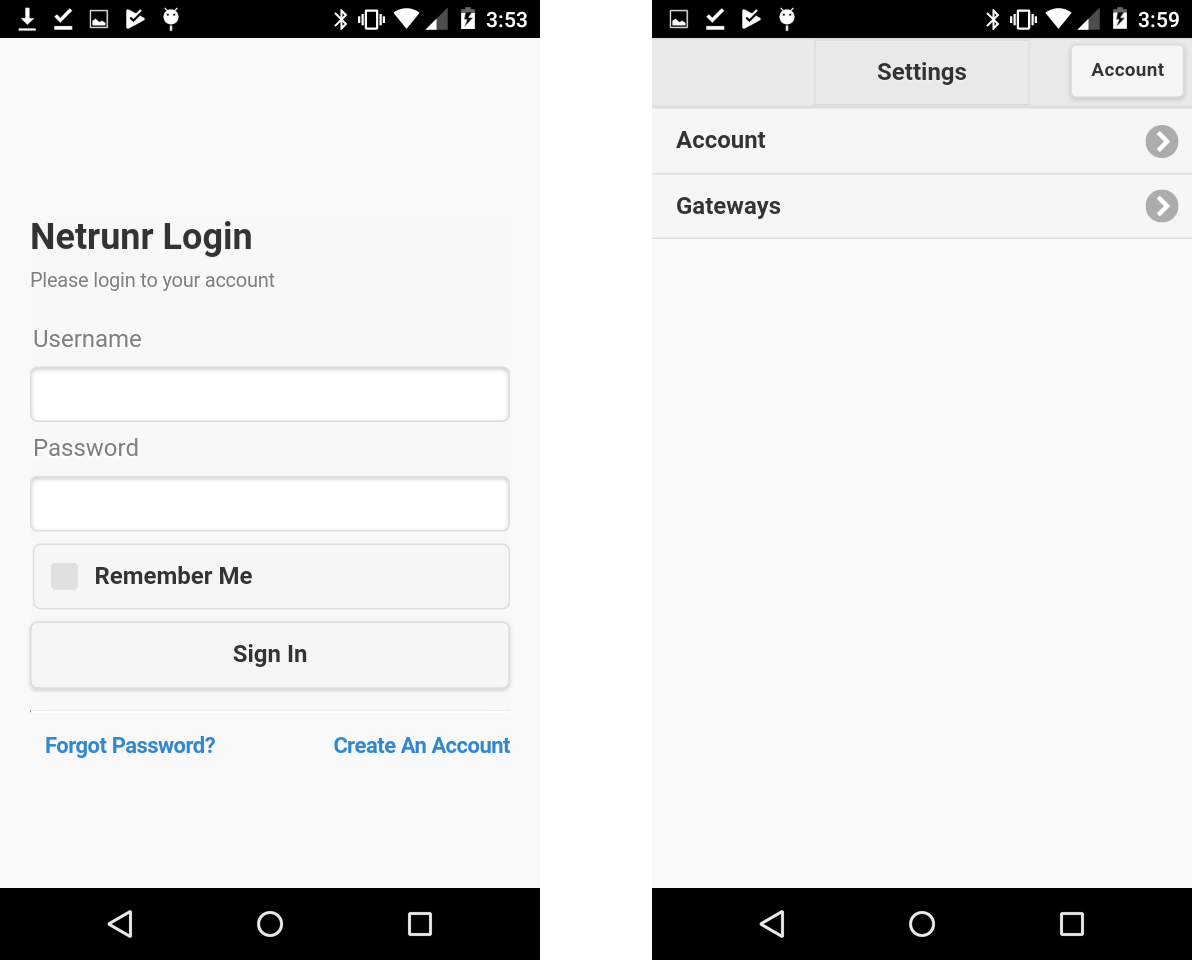
- Start Netrunr app.
- Using your account credentials, sign-in into your account.
- Select Gateways.
- Using the micro-USB cable, power up the Netrunr Gateway. The micro-USB port is located at the back of the gateway. Any 5V, 0.5A USB power supply can be used as a power source for the gateway.
- Monitor the blue color status LED on the front of the gateway.
- The gateway requires about 30 seconds to boot-up. During this phase, the blue status LED will transition from steady light to fast blink to finally slow blink (one second ON and one second OFF).
- The slow blink state of the status LED indicates that the gateway is in the Provisioning State.
- With the gateway in the Provisioning State, select Scan for Netrunr Gateways button in the app.
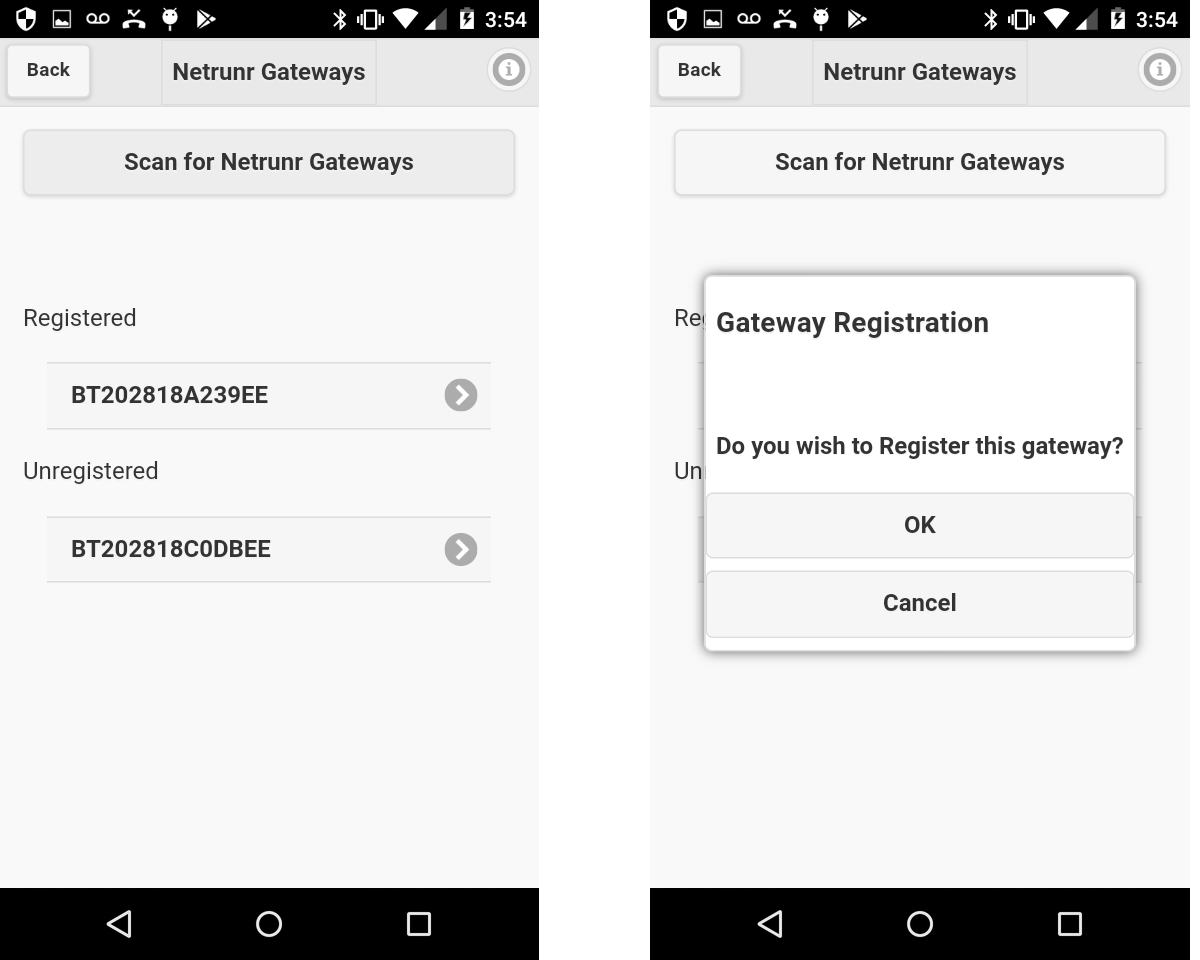
- Wait a few moments for the scan to complete.
- Any newly discovered gateways that are Unregistered to any accounts will be listed under Unregistered.
- Select the gateway.
- A Gateway Registration confirmation box will be displayed.
- Select OK to Register the gateway.
- If you do not see your gateway listed, verify that the gateway is in the Provisioning State and run the scan again. This step uses the Bluetooth radio for configuration. Your gateway has to be within the Bluetooth range.
You have now Registered your Netrunr gateway.
Network Connection
If you are using a wired network connection, plug the network cable into the WAN port of the gateway. You are done!
If you are using a Wi-Fi network connection, proceed to the next section.
Add Wi-Fi credentials
The Netrunr app is used to configure Wi-Fi access.
- Start Netrunr app.
- Using your account credentials, sign-in into your account.
- Select Gateways.
- Make sure the gateway is powered-up and in the Provisioning State (The blue status LED should be blinking slowly).
- With the gateway in the Provisioning State, press Scan for Netrunr Gateways button in the app.
- Wait a few moments for the scan to complete.
- All gateways that are Registered to the account will be listed as Registered.
- Only the gateways that are in the Provisioning State can be selected.
- If you do not see your gateway listed, verify that the gateway is in the Provisioning State, and run the scan again.
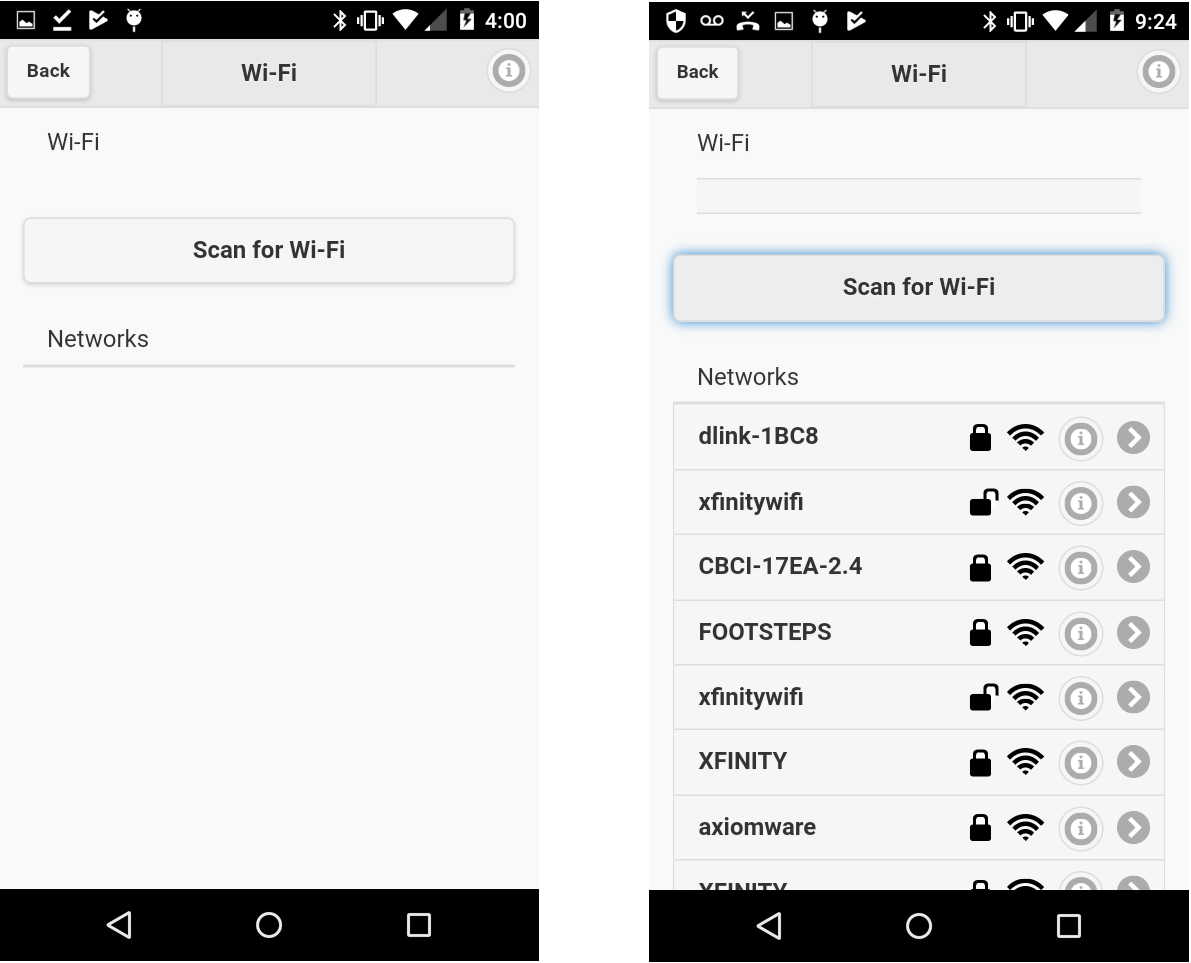
- Under the Registered list, select the Netrunr gateway that matches the ID printed on the bottom of your gateway.
- To scan for available Wi-Fi routers, press Scan for Wi-Fi
- Select the Wi-Fi router that you want to use.
Next:
- Enter Wi-Fi password and press OK.
- If the Wi-Fi credentials are correct, the Netrunr B24E gateway will be connected to your network.
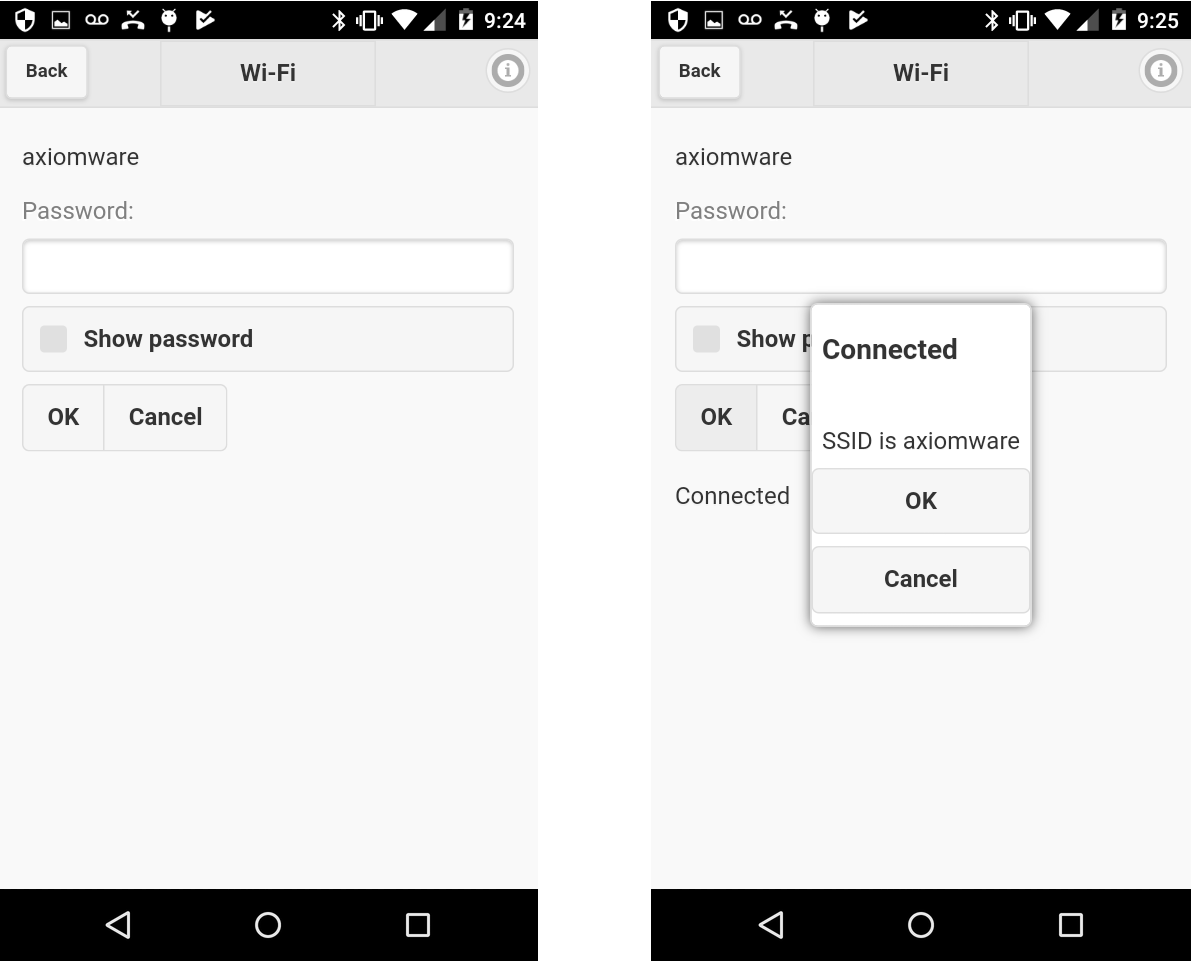
Congratulations! You have successfully configured the network connection for your gateway.